In order to configure the availability of products during specific holidays, you need to follow a series of steps. This guide will walk you through the process of setting up your product settings for holidays.
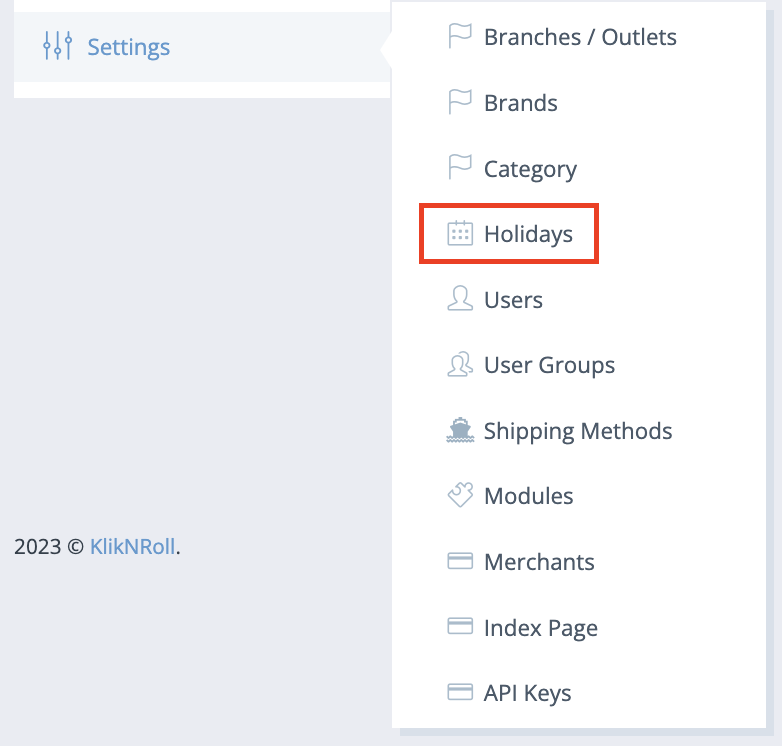
Step 1: Navigate to the Settings menu and select “Holidays”.
Step 2: Click on the “+Add” button located at the top right corner to create a new branch.

Step 3: Insert the general information of the holiday.
- Country: The nation associated with the particular holiday.
- The date: The specific date when the holiday is observed.
- Name: The title or designation of the holiday.

Step 4: Click on the “Save” button to save your holiday’s settings.

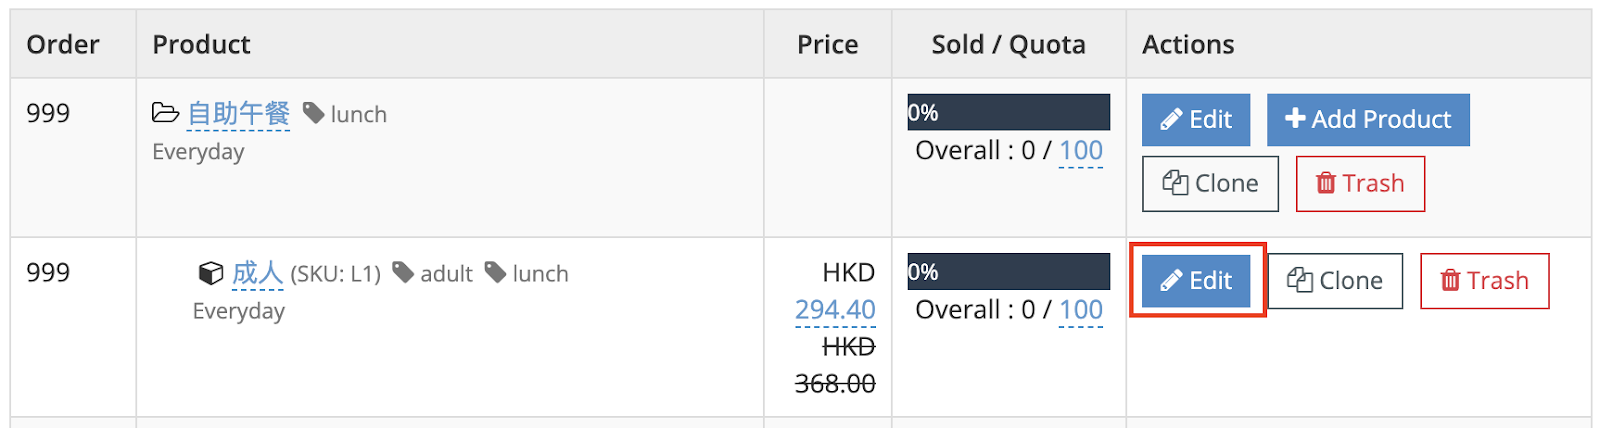
Step 5: Navigate back to the product tab. Next, locate the product group/child that will be available during the holiday and click on the “Edit” option.
Step 6: Select the “Holiday” option from the Days of Availability (or Available Days) choices to activate the product for the predetermined holidays set in Steps 1-4.

Step 7: Click on the “Save” button to save your product settings. This particular product will be accessible during the holiday season.