
⚠️: Before creating a campaign, kindly complete the Profile Settings.
Campaigns serve as a platform for merchants to create landing pages within the Online Booking System. These pages provide a user-friendly interface for customers to conveniently select their preferred reservation date and branches. Additionally, customers can easily make payments through the campaign settings.
The campaign settings are where users configure the fundamental details of their campaign.
Step 1: Navigate to the Campaigns menu and click “+New” or “+New Campaigns” at the top right corner.

Step 2: Select your desirable module. For this case, we will select Dining 2026
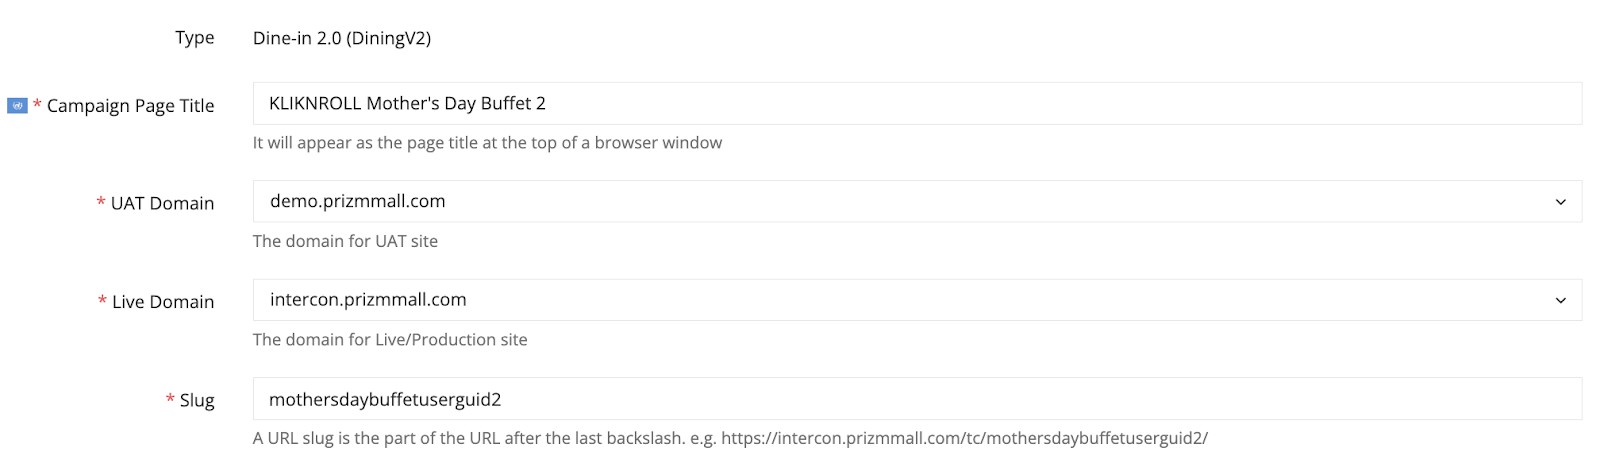
Step 3: Fill in campaign settings.
- Title: Insert the title of this campaign.
- UAT Domain: The UAT Domain is a dedicated testing environment where end-users validate the functionality and performance of a system before it is deployed for actual use.
- Live Domain: The Live Domain refers to the actual production environment or the live system where the software or application is deployed and accessible to end-users for real-world use.
- Slug: URL fragment that represents a specific page or resource on a website. For example, https://<your domain>/<slug>/
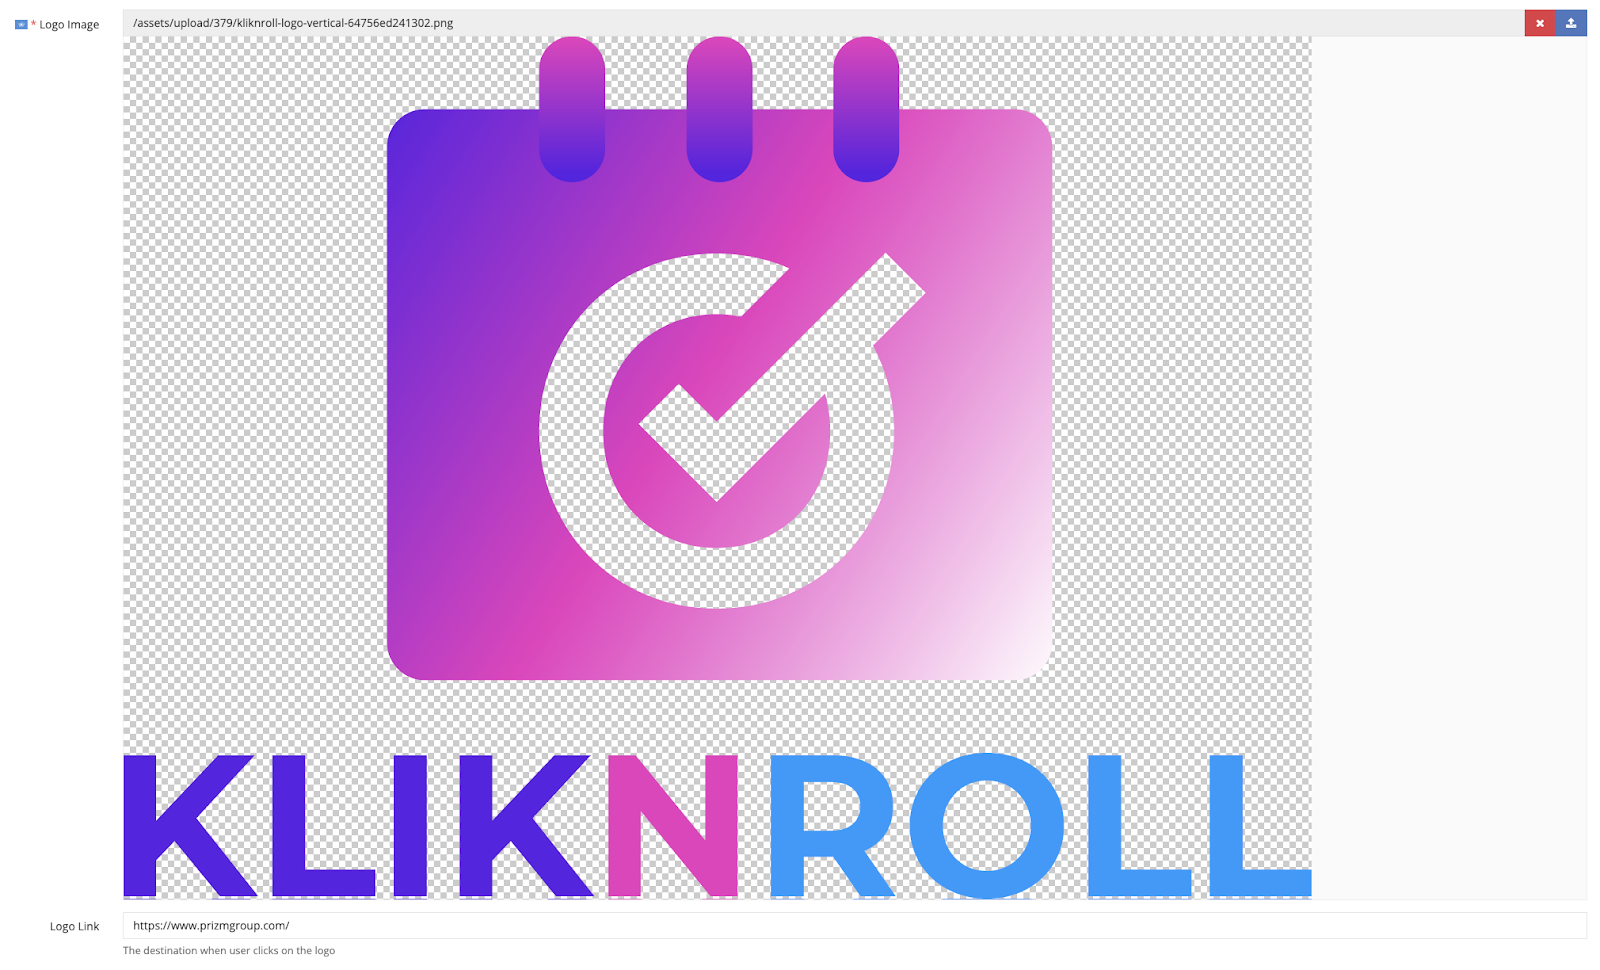
- Logo Image: Insert your logo that will appear in the top left corner of the campaign page. Hint: Optimal image sizes – W145 x H80.
Step 4: Click on the “Save” button to save your campaign’s settings.

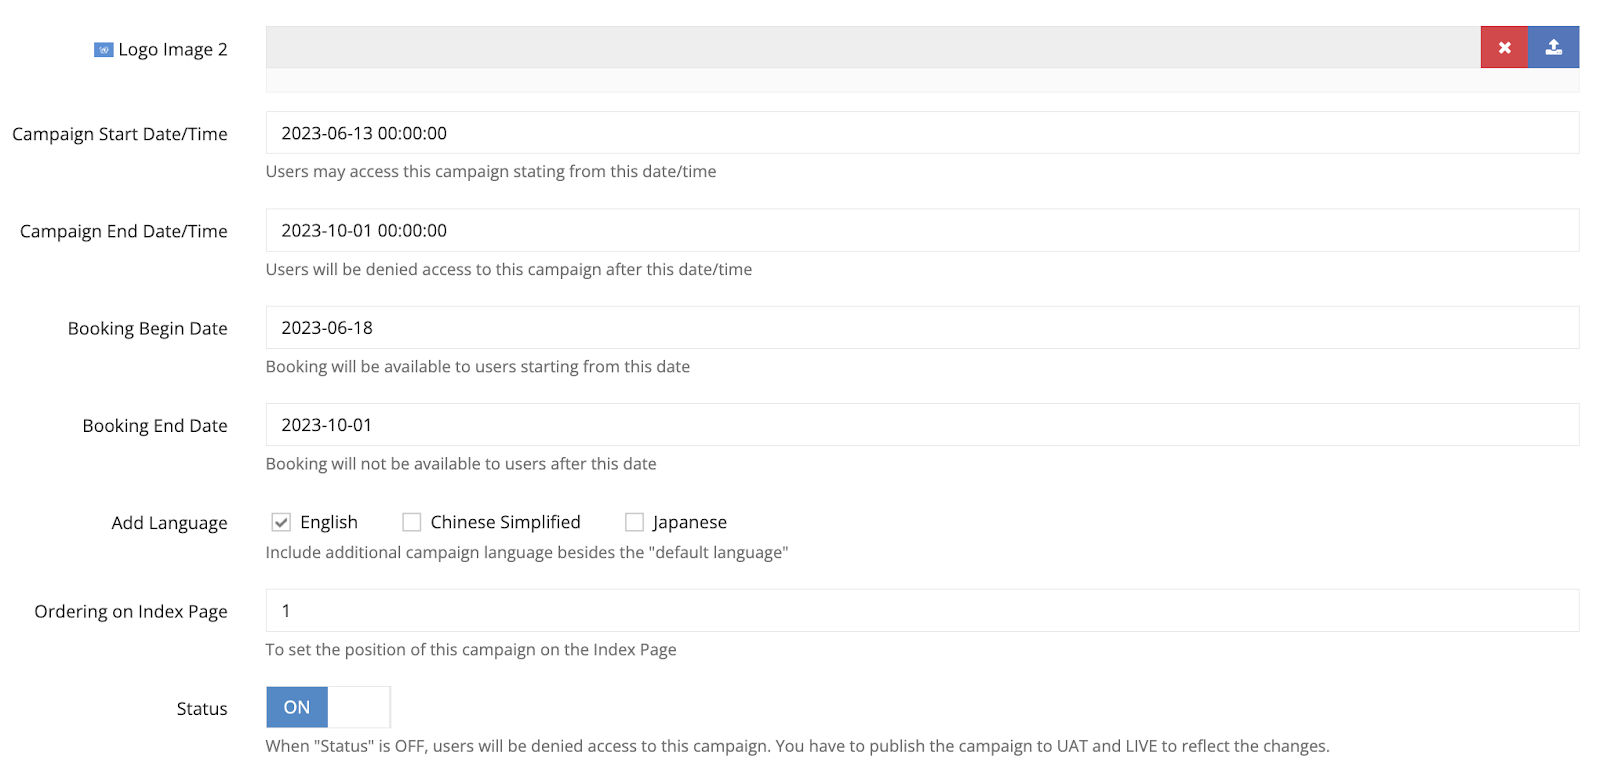
Step 5: Provide additional campaign settings.
- Logo Link: Specify the URL of the landing page that should be opened when users click on the logo.
- Campaign Start Date/Time: Customers may access this campaign starting from this date/time
- Campaign End Date/Time: Customers will be denied access to this campaign after this date/time.
- Booking Start Date: Booking will be available to customers starting from this date.
- Booking End Date: Booking will be available to customers after this date.
- Ordering on Index Page: Determine the order in which this campaign will appear in the index page.
- Add Languages: By default, the system will use Traditional Chinese as the primary language. However, users have the option to add additional languages, including English, Japanese, and Simplified Chinese. This selection is important to prevent any data loss or inconvenience that may occur if you decide to add or remove languages later on.
Step 6: Toggle the status to “ON” to activate the campaign.
Step 7: Proceed to edit the remaining languages, if applicable.
Step 8: Click on the “Save” button to save your additional campaign’s settings.